The Blog Is Moving- Please Come Too!!

After lots of mulling, I finally took the plunge and went self-hosted for my blog!

So my new blog is www.thebarethreads.com please come see me there!
All my subscribers are being migrated so hopefully I wont lose* anyone!

caitlins-top-and-legings

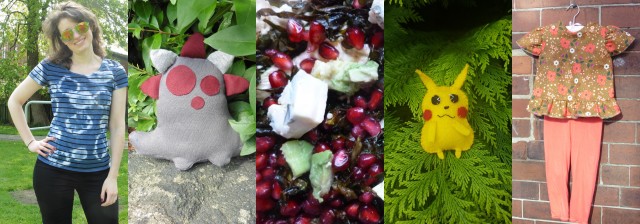
One of the main reasons if that I was about to hit the ceiling on my media uploads and would have had to pay to expand that storage anyway.  I had this blog for three years so I felt like I was doing pretty well, but had cut corners with appearance and formatting to use as few images as possible.  I started using collages of images so I could get around the upload limit which worked sometimes but limited me in other times.

I hope to take advantage of the other benefits of self-hosting at some point, but right now I have to move house…

www.thebarethreads.com


*lose…loose…lose…anyone know?

How To Add Hyperlinks To Images On WordPress.com

If you add images to your blog post you might want to add hyperlinks to the images so that if someone clicks on the image they are redirected to another of your posts or perhaps an external site.  I haven’t found a way of doing that apart from editing the html code for the blog post.

CNV00018Start a blog post and add an image from the media library as normal, it’ll be easier to do it without any other text on the page. Then click the HTML tab at the top right hand side and you’ll see the html code for the image.

I have added this snowy graveyard pic and below is the html code for it:

<a href=”https ://thebarethreads.files.wordpress.com/2015/01/cnv00018.jpg“><img class=” size-medium wp-image-2041 alignleft” src=”https ://thebarethreads.files.wordpress.com/2015/01/cnv00018.jpg?w=300″ alt=”CNV00018″ width=”300″ height=”201″ /></a>

The bit in red is current link which just links to a ‘media page’ which is basically just a full page image- as you can see I give my files quite exciting names!  But this is the chunk of text you want to delete and replace with the URL of the hyperlink you want to add. But don’t edit the surrounding text.*

<a href=”https:  //thebarethreads.wordpress.com/2015/02/12/lomography-photography-mini-diana-f/”><img class=” size-medium wp-image-2041 alignleft” src=”https:// thebarethreads.files.wordpress.com/2015/01/cnv00018.jpg?w=300″ alt=”CNV00018″ width=”300″ height=”201″ /></a>

You’ll need to preview the post to check the link is working properly. I hope this helps!

*I had to add a space after the https because it was turning it into an unwanted hyperlink but just use the existing html!

How To Change Font Colour for WordPress.com Blog Posts

I decided a while ago, when I wrote a book review blog post and wanted to hide some spoilers by turning my text white, that I needed to learn the html code to change the font colour of my blog post as you can’t do it otherwise.

Go to a new blog post and click the HTML tab and paste in the following.

<span style=”color:#FF0000;”>texttexttext</span>

texttexttext

Whatever you type in the text section will be coloured.  You could therefore colour the whole post or just one word:

This post is really <span style=”color:#FF0000;”>AWESOME</span> thanks for reading!

This post is really AWESOME thanks for reading!

There are lots of colour codes to pick from but here are a few of the basic colours:

Black- #000000
Navy- #000080
Turquoise-#43C6DB
Apple Green- #4CC417
Yellow- #FFFF00
Red- #FF0000
Pink- #FAAFBE
Purple- #8E35FF
White- #FFFFFF
Orange- #FFA500

So you could do different colours for each word.
Although it takes about a year to write a sentence! The code is below:

<span style=”color: #ff0000;”>So </span><span style=”color: #000000;”>you </span><span style=”color: #43c6db;”>could </span><span style=”color: #faafbe;”>do </span><span style=”color: #000080;”>different </span><span style=”color: #4cc417;”>colours </span><span style=”color: #ffff00;”>for </span><span style=”color: #8e35ff;”>each </span><span style=”color: #ffa500;”>word.</span>

Hope that made sense!

How to Add Blog Post Columns in WordPress.com

If you don’t have wordpress.org you may feel a little restricted by your customisation options- I was too so I learnt a little bit of HTML coding so I could make some changes to my blog posts.  So this is the code you’ll need to put your blog post text in columns. (It’s not that hard!)

When you write your blog posts you’ll see two little tabs at the top right of the post, one saying Visual and the other says HTML. Click on the HTML tab and paste the following:

<div style=”width:40%;padding:0 10pt 0 0;float:left;”>
TEXT 1
TEXT 1
TEXT 1
</div>

<div style=”width:40%;padding:0 10pt 0 0;float:right;”>
TEXT 2
TEXT 2
TEXT 2
</div>

The text is sandwiched between the ‘div’s, and everything you write in-between the <div…</div> will be columned.  And it will look like this:

TEXT 1
TEXT 1
TEXT 1
TEXT 2
TEXT 2
TEXT 2

If you want to create 3 columns then change the 40% to 30% and type it three times not just twice. If you want to then return to a full width column (so some of your text is in columns and some isn’t) then paste in this around the text you want to affect:

<div style=”width:98%;padding:0 10pt 0 0;float:right;”>
THIS IS THE CONTENT TEXT, PLEASE PRESS PREVIEW TO CHECK IT’S ALL CORRECT!
</div>

You can change the ‘%’ to whatever you want, it’s the percentage of the blog post that the column takes up.  They don’t have to be the same size, but I wouldn’t recommend going bigger than 98% or your edge text will get cut off. (So if you do 4 columns you might want to do 25%, 25% 25% and 23%).

You can write out your whole post in the HTML tab or just the code you know and then switch back to the Visual tab.

So that’s columns, any questions?